
In the realm of creative digital tools, the Microsoft Surface Dial stands out as an innovative device that reimagines how we interact with our work. With its sleek, minimalist design and promise to enhance the user experience, the Dial has garnered a following among artists, designers, and any creative professionals looking to add an extra level of connectivity to their digital workspace. But does it live up to the hype? This review addresses the Surface Dial’s practicality, compatibility with various platforms, and ultimately, whether it’s a must-have creative companion.
What It Is

The Microsoft Surface Dial is a Bluetooth-enabled, puck-like input device that works alongside Surface devices as well as select Windows 10 PCs. Its primary function is to provide a range of customizable shortcuts that can be accessed with a twist, a click, or a press. It can be used on or off the screen, and the haptic feedback ensures a satisfying user experience. Out of the box, the Dial comes with a CR2450 battery, ensuring that new users can get up and running immediately.
Who Can Use It?
The Dial’s appeal lies largely in its suitability for a specific group of people. If you’re an artist who relies heavily on digital art software, the Dial could streamline your workflow. For architects and engineers, it can provide fine-tuned, incremental adjustments. Even if you’re not in a field that’s traditionally seen as ‘creative’, the Dial can still add speed and precision to a range of tasks, from scrolling through documents to scrubbing through video timelines.
What Does It Do Exactly?
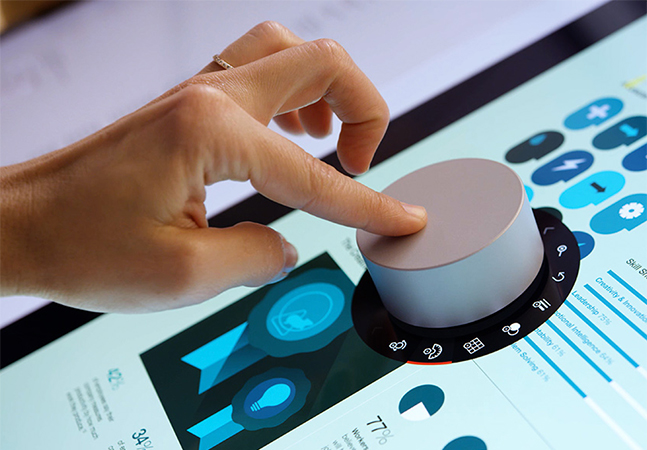
The Dial’s functionality varies depending on the application you’re using. In digital art programs like Adobe Photoshop or Illustrator, the Dial can control brush size, zoom, or color selection. In Microsoft’s CAD programs or video editing software, it can be used to rotate or resize 3D models or change the speed of a video. The Dial can also act as a simple jog wheel, scrolling control, or volume adjustment for media players and other apps.
What Apps Support It?
Microsoft has done a commendable job of integrating the Dial with its suite of applications. Microsoft Office, Windows Maps, and even the Edge browser have Dial support. Additionally, numerous third-party apps such as Spotify, Sketchable, and Bluebeam Revu support the Dial. While not all applications have full-feature support for the Dial, more and more are adding support with each update.
SUGGESTED POST: Can You Charge a Fitbit with a Phone Charger?
Worth the $99?

The Surface Dial is a premium accessory, priced at $99. When evaluating its worth, it’s essential to consider just how frequently it will improve your daily tasks. For professionals in the creative and design fields, the Dial can be an invaluable tool. Its ability to customize shortcuts to specific tasks can save significant time over a day. However, for the average user, the Dial may feel like a luxury rather than a necessity.
Final Words on the Surface Dial
In conclusion, the Surface Dial is a well-crafted device that delivers on its promise of enhancing the creative process and offering innovative interaction with digital content. Its build quality, battery life, and ease of use make it a compelling tool for those who seek to expedite their daily digital tasks. However, its utility is highly context-dependent, and for some, the steep price may not be justified by the occasional use it might see.
RECOMMENDED POST: How to Connect Fitbit to Android: A Comprehensive Guide 2024
FAQs About Surface Dial Reviews
Is the Surface Dial Compatible with MacBook or Other Non-Windows Devices?
No, the Surface Dial is specifically designed to work with Microsoft Surface devices and select Windows 10 PCs. It is not compatible with MacBooks or devices running non-Windows operating systems.
Can I Use the Surface Dial as a Mouse Replacement?
The Surface Dial is not designed to be a mouse or a mouse replacement. It functions more as a complement to your existing input devices, providing quick access to shortcuts and controls for incompatible applications.
Does the Surface Dial Work with Touchscreens Only?
No, the Surface Dial can function both on and off the screen. When on the screen of a compatible device, it provides additional context menus and controls in some applications. When used off-screen, it can still adjust settings and perform other tasks wirelessly.