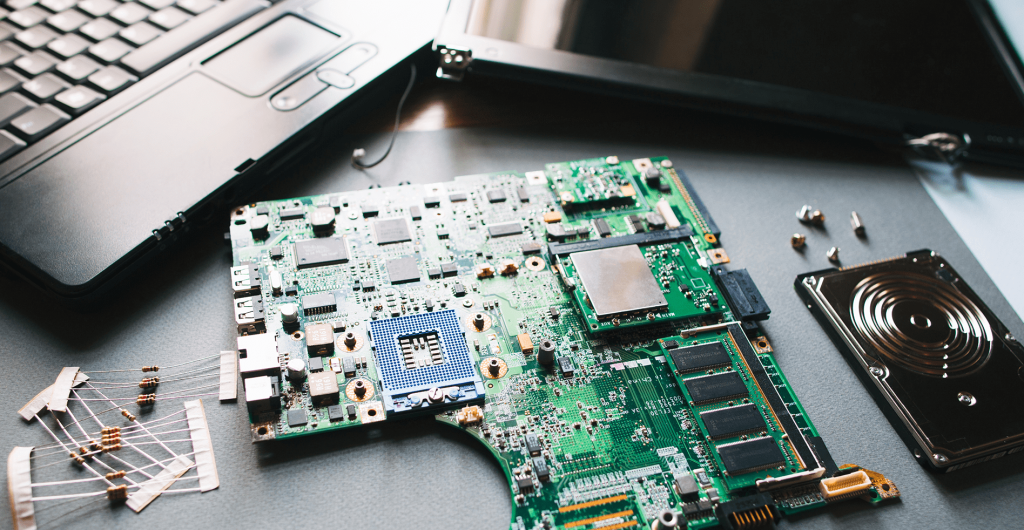
As a computer user or technician, understanding how to test a motherboard with a multimeter can come in handy when troubleshooting hardware issues. A motherboard is the backbone of a computer system and acts as a hub that connects different components such as the processor, RAM, and peripherals.
Testing a motherboard with a multimeter may seem like a daunting task, but it is actually quite simple if you have the right tools and know-how. By using a multimeter, you can easily diagnose any issues with your motherboard, such as power supply problems or faulty components. With a few simple steps, you can determine whether your motherboard is functioning properly or needs to be replaced. Throughout this article, we will examine how to test and diagnose motherboard faults using a multimeter.
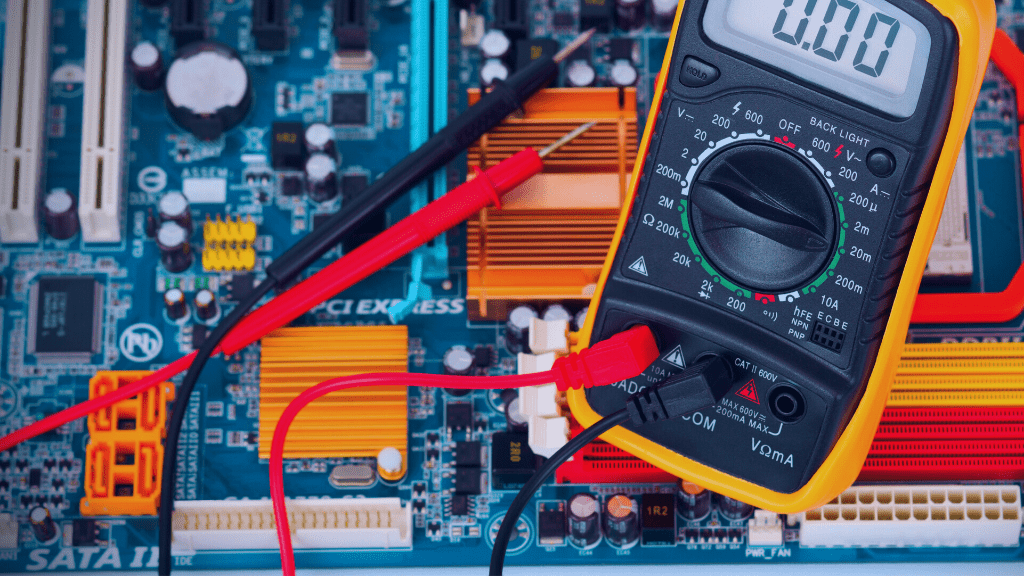
The first step in testing a motherboard with a multimeter is to ensure that you have the necessary tools. In order to measure voltage, resistance, and current, you will need a multimeter. You will also need a power supply unit (PSU) and a few cables. It is important to note that working with a multimeter requires some technical knowledge, so it is best to read the manual and familiarize yourself with its functions before getting started.
What is a Multimeter?
A Multimeter is an electronic tool for determining voltage, current, resistance, and other electrical quantities. It is a versatile device that can be used for various electrical and electronic applications. Multimeters can be analog or digital, with the latter being more common in modern times due to their ease of use and accuracy.
A multimeter typically has two probes, which are used to make contact with the circuit being tested. The multimeter then displays the measurement on a screen, either in numerical or analog form. Some multimeters also have additional features such as continuity testing, which checks whether a circuit is complete, and diode testing, which checks the polarity of diodes. Multimeters can be used for a variety of applications, including troubleshooting electrical equipment, testing batteries, and power supplies, and measuring the resistance of wires and components.
Also Read: How To Get Phone Records From Straight Talk?
Symptoms of Faulty Motherboard
The motherboard is an essential component that keeps the computer running smoothly. However, a bad motherboard can cause the entire system to malfunction, resulting in various symptoms that can indicate a faulty motherboard. These are some signs of a bad motherboard:
No Power
A faulty motherboard can cause the computer system to fail to power on. When you press the power button, there’s no response from the computer system, and the fans do not spin.
System Crashes
A faulty motherboard could cause your computer to crash or freeze frequently. Data flows between the components of the system through the motherboard, and a faulty motherboard can cause data corruption or miscommunication, resulting in system failure.
Overheating
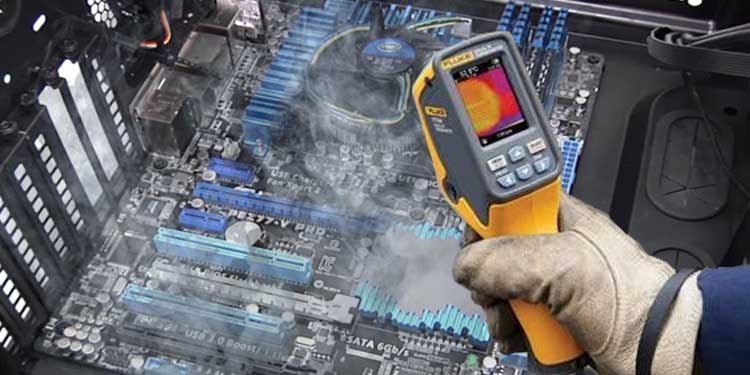
A bad motherboard can cause the computer system to overheat, even if the cooling system is working correctly. Overheating can cause the system to shut down unexpectedly and can also damage the other components of the system.
Peripherals Not Working

A faulty motherboard can cause peripherals such as USB ports, sound cards, and Ethernet ports to stop working. These peripherals rely on the motherboard to function correctly, and if the motherboard is faulty, it will not work correctly.
Blue Screen of Death
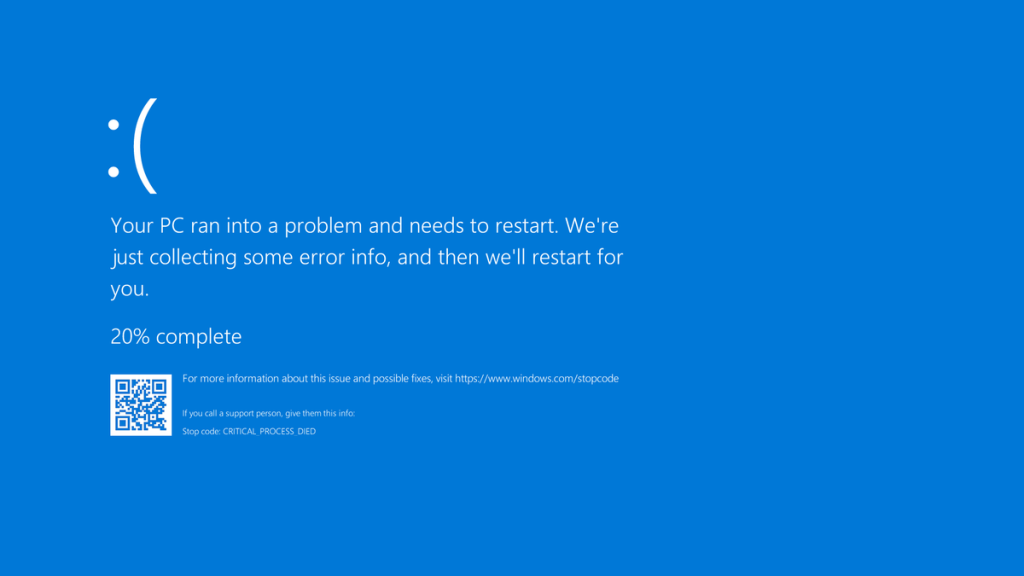
A blue screen of death (BSOD) is a critical system error that occurs when the operating system encounters a problem it cannot recover from. A faulty motherboard can cause BSODs, and they can occur randomly or when performing specific tasks.
What to Check Before Testing the Motherboard?
Before testing the motherboard with a multimeter, there are a few things you should check to ensure that you are working safely and effectively. Here are some important factors to consider:
Power Supply Unit (PSU)
Ensure that your PSU is working properly and providing the correct amount of power to your motherboard. Check the PSU’s cables and connectors for any signs of damage or wear.
Motherboard Manual
Review the motherboard manual to understand the layout and functions of the components. This will help you to locate and test the specific areas of the motherboard.
Static Electricity
It can damage delicate electronic components, so it is important to ground yourself before handling the motherboard. Static electricity can be discharged by wearing an anti-static wristband or touching a grounded metal surface.
Visual Inspection
Visually inspect the motherboard for any signs of damage, such as burnt areas, swollen capacitors, or missing components. These issues can indicate a problem with the motherboard that may require replacement.
BIOS Settings
Make sure your BIOS settings are configured correctly. Incorrect settings can cause problems with the motherboard’s performance.
How to Test a Motherboard With a Multimeter?
If you suspect that your computer’s motherboard is not working properly, it is important to diagnose the issue before spending money on a replacement. Fortunately, you can use a multimeter to test the motherboard and identify any faults.
Before we begin, it is important to note that working with a motherboard can be risky if you do not take the proper precautions. Always wear an anti-static wrist strap to prevent any static electricity from damaging the motherboard. Also, make sure your multimeter is set to the appropriate settings before using it on the motherboard.
Step 1: Power off the Computer

Be sure to turn off the computer and unplug it from the wall outlet before testing the motherboard. This will prevent any damage to the motherboard or other components.
Step 2: Locate the ATX Power Connector
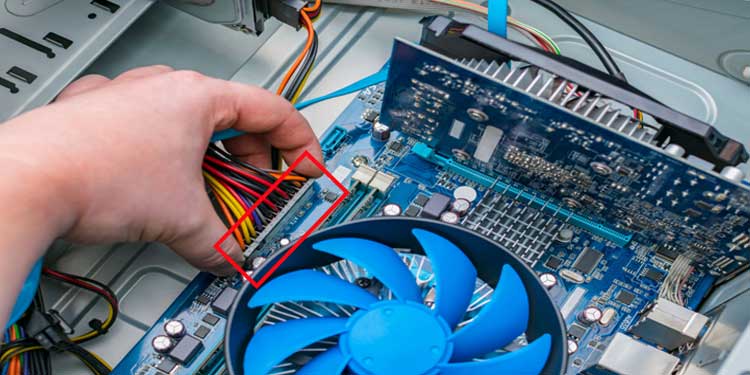
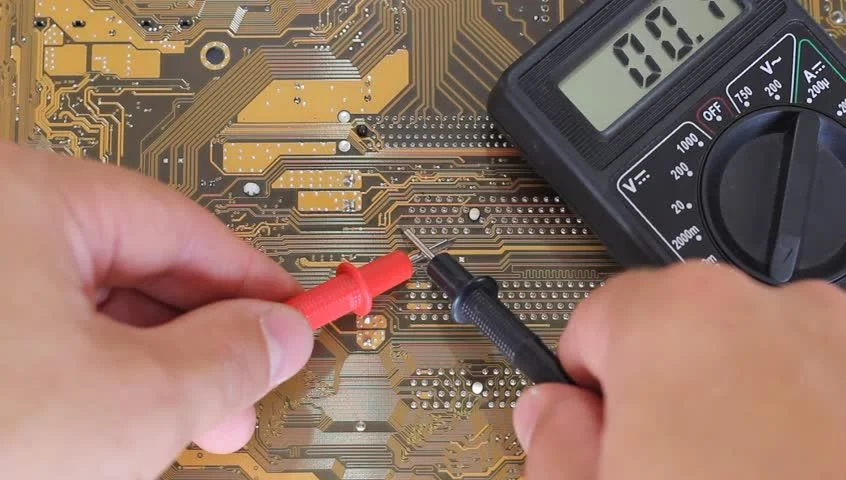
The ATX power connector is a large, rectangular connector located on the motherboard. Power is provided to the motherboard and other components through this cable. With the voltage testing feature on your multimeter, test the pins on the ATX power connector to ensure that they are receiving the correct voltage. The pins should be labeled with their respective voltages, so make sure to refer to the motherboard manual to identify them.
Step 3: Test the CMOS Battery
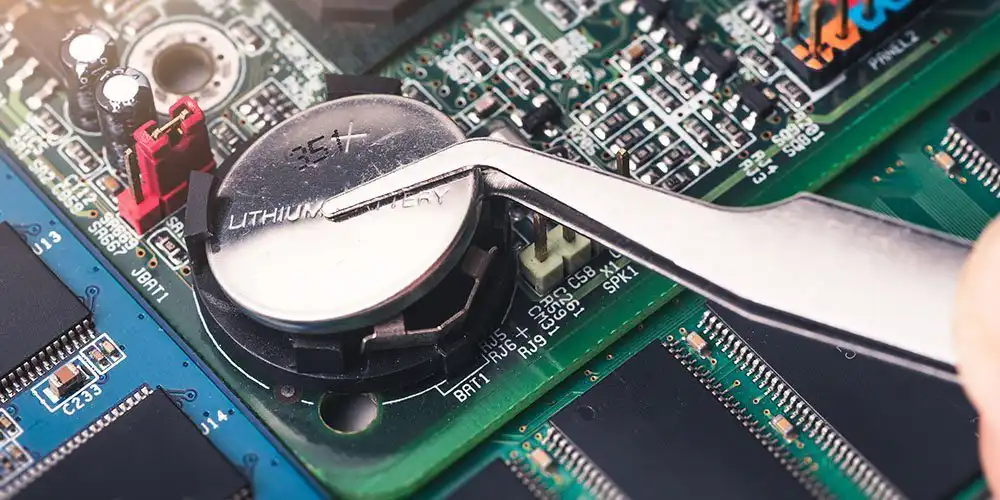
The CMOS battery is a small, circular battery located on the motherboard. It provides power to the motherboard’s BIOS settings when the computer is turned off. To test the CMOS battery, use your multimeter’s voltage testing function to measure the voltage across the positive and negative terminals of the battery. The voltage should be around 3 volts. If the voltage is significantly lower than 3 volts, the battery may need to be replaced.
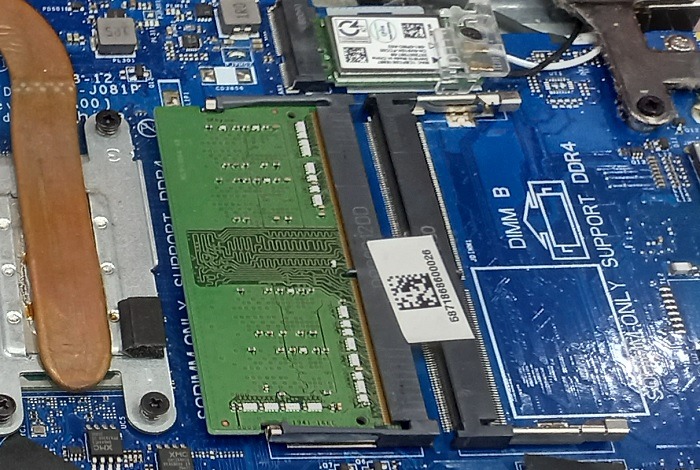
Step 4: Check the RAM Slots
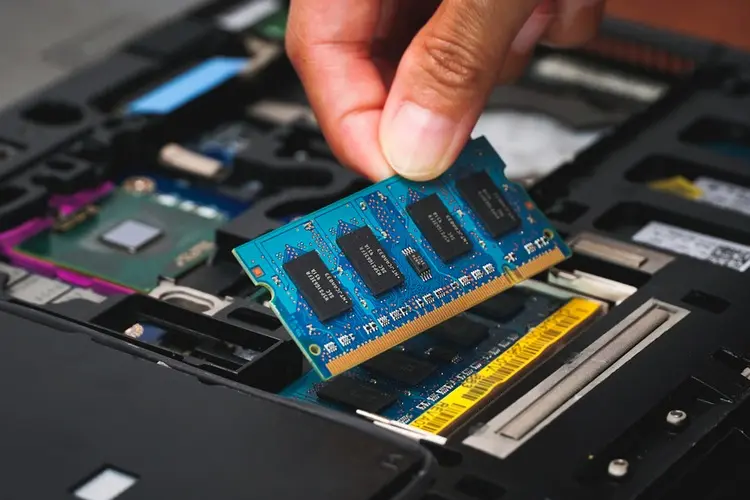
Computers have RAM slots on their motherboards that hold memory modules. If the RAM slots are faulty, the computer may not boot up properly. Whether you have a multimeter, you can use it to check the continuity of the contacts on the RAM slots to see if they are working. If the contacts are not making a connection, the RAM may need to be reseated or the slots may need to be replaced.
Step 5: Test the CPU Socket
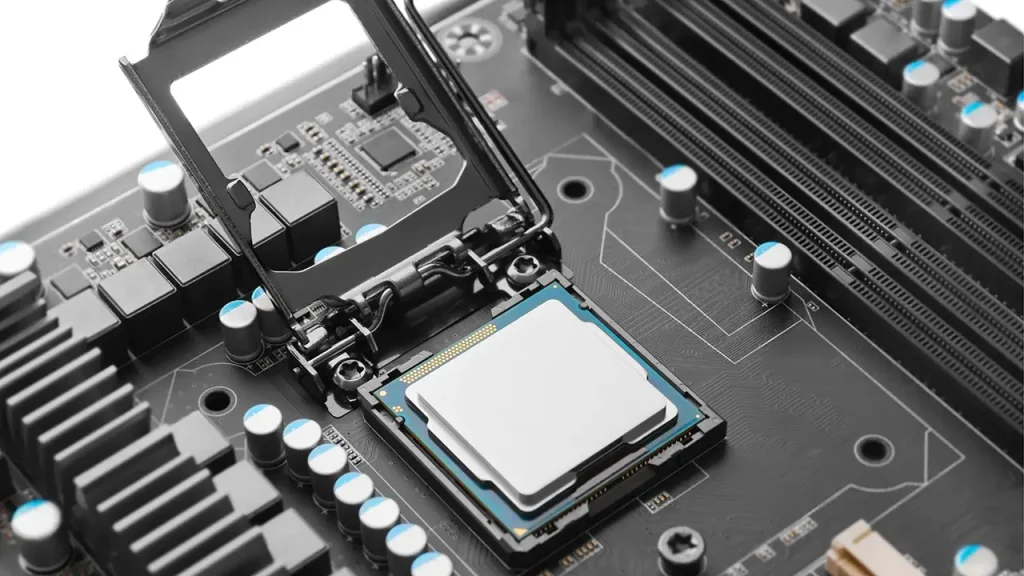
The CPU socket is where the computer’s processor is installed. If the CPU socket is faulty, the computer may not boot up properly. Make sure that the contacts on the CPU socket are intact by using the continuity testing function of your multimeter. The socket may need to be replaced if the contacts do not connect.
Step 6: Test the Expansion Slots
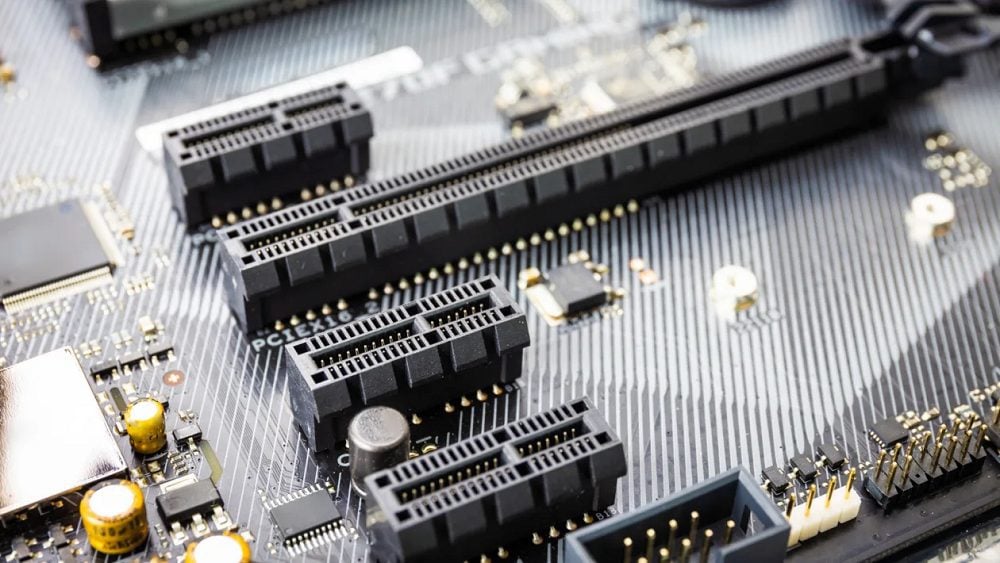
There are expansion slots available on the motherboard, such as PCI and PCIe slots, which are used to connect expansion cards, such as graphics cards and network cards, to the motherboard. If the expansion slots are faulty, the expansion cards may not function properly. Test the expansion slots’ contacts using the continuity testing function on your multimeter. If the contacts are not making a connection, the slots may need to be replaced.
Step 7: Test the BIOS Chip
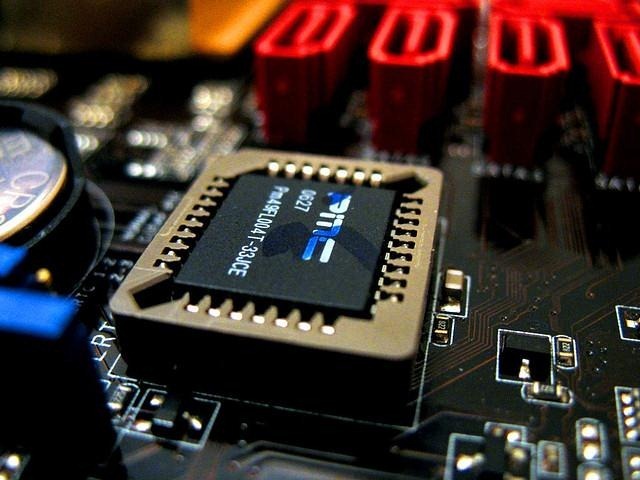
The BIOS chip is a small, square chip located on the motherboard that contains the motherboard’s BIOS firmware. If the BIOS chip is faulty, the computer may not boot up properly or may experience other issues. To test the BIOS chip, use your multimeter’s continuity testing function to test the contacts on the chip. Having trouble connecting the contacts may necessitate replacing the chip.
Step 8: Check the Power Supply

It provides power to all other components on the motherboard, including the video card. If the power supply is faulty, the computer may not boot up properly or may experience other issues. To test the power supply, you can use a power supply tester or a multimeter’s voltage testing function.
With the power supply turned off and unplugged from the wall outlet, use your chosen tool to test the voltages of the power supply’s connectors. The voltages should match the specifications listed on the power supply label. If the voltages are significantly different or there is no voltage at all, the power supply may need to be replaced.
Step 9: Inspect the Motherboard for Physical Damage
If you have gone through all the previous steps and still cannot identify the issue with the motherboard, it is time to inspect the motherboard for physical damage. Look for any signs of burn marks, broken or bent pins, or any other obvious damage. If you do find physical damage, the motherboard may need to be replaced.
Step 10: Consult with a Professional

If you are not comfortable or experienced in testing a motherboard with a multimeter or cannot identify the issue on your own, it is best to consult with a professional. They can use specialized equipment and expertise to identify and repair any issues with your motherboard.
What If the Readings are Outside the Acceptable Range?
If any of the voltage readings are outside the acceptable range, it means that the corresponding component is faulty, and it needs to be replaced. You can identify a faulty component by following these tips:
- If the voltage across the ATX 24-pin connector is low or absent, it means that the power supply unit (PSU) is faulty, and it needs to be replaced.
- If the voltage across the CPU power connector is low or absent, it means that the PSU or the motherboard’s voltage regulator module (VRM) is faulty.
- If the voltage across the RAM slots is low or absent, it means that the RAM module or the RAM slot is faulty. You can test this by removing one RAM module at a time and checking the voltage across the RAM slots.
- If the voltage across the SATA connectors is low or absent. It means that the storage device such as a hard drive or solid-state drive may be faulty. There could be a problem with the power supply or the SATA cable. You can try swapping out the SATA cable or using a different power supply to see if this resolves the issue.
Note: If the issue persists, you may need to replace the storage device. Before doing so, it is recommended to back up any important data on the storage device as replacing it will result in the loss of all data stored on it.
Final Words
Testing a motherboard with a multimeter can help identify any faults and diagnose the issue with your computer system. By measuring the voltage across different components of the motherboard, you can identify any faulty parts that need to be replaced. A faulty motherboard can cause various symptoms, including system crashes, overheating, and peripherals not working, among others. It is essential to take the necessary precautions when testing a motherboard and consult with a professional technician if you’re not confident in your abilities.
Must Read: How to Remove No Signal from Your LG TV?
FAQs About How to Test a Motherboard With a Multimeter?
Here are some following FAQs about Testing a Motherboard With a Multimeter:
What equipment do I need to test a motherboard with a multimeter?
To test a motherboard with a multimeter, you will need a digital multimeter, also known as a DMM, and a set of probes. The DMM should have a continuity test setting, which is used to check if a circuit is complete. Probes are used on motherboards to test components and make contact with them.
How do I prepare my motherboard for testing with a multimeter?
Be sure to disconnect the power supply and other components before testing the motherboard. It is also essential to remove any batteries or power sources that attaches to the motherboard, such as CMOS batteries.
How do I use a multimeter to test the power supply of my motherboard?
Set your multimeter to DC voltage to test the power supply on your motherboard. To connect the probes, connect the red probe to the positive terminal and the black probe to the negative terminal of the power supply. Turn on the power supply and check the reading on the multimeter. The power supply is functioning properly if the reading falls within the acceptable range.